
Showing posts with label living room. Show all posts
Showing posts with label living room. Show all posts
Hey Guys! Halloween is upon us, and I figured that there was no time like the present than to share with you the simple fall updates that did for the fireplace. It's a fall fireplace face lift for less than $5 - say that five times fast! :)
Now if you remember my fall refresh from last year, you'll know that I'm not really the "decorating for Halloween" kind of gal. I typically like to through in a few fall accents (copper, orange, black and white), pumpkin or two, and a banner. This year, I thought I'd try something different. I wondered what our colorful happy space would look like with a little "spook" thrown in. To achieve this look, I went no further than my attic for some of last year's pumpkins, and of course Target for a 1$ spider web and a large $3 spider.

Side note: Can we just talk about how long our pathos is getting? I feel like such a proud plant momma! Also my copper plant holders are just begging to get filled with more plant-y goodness, but I'm unsure about what species of plants I want to use. Do you have any house plants that you swear by? Any and all suggestions are totally welcome.

Instead of going with several small spiders, I thought to only do one large spider for 3 reasons:
1. The web looked large enough to be created by one HUGE spider
2. Honestly, one spider freaked me out enough
3. In a moment of panic or delusion I could always discern whether or not this was fake.
It's so weird because it creates just enough tension emotionally for it to be effective. I'm a little thrown off every time I come into the room. In short, I pray I never see a spider this large in my home.

Fun fact, when you rotate this Goodwill painting 180 degrees you still see a man in a hat. It's crazy. And once you see it, you can't un-see it. THANKS BRANDON! The copper candle holders were also a Target steal from last year that I snagged from my coffee table.

To apply the web, I just started at the top corner of the large artwork and worked my way down spreading the cotton as thin as possible. It's was honestly pretty simple. It stuck remarkably well to the moulding of the fireplace. I was pretty pleased for 5-7 minutes of effort. :)

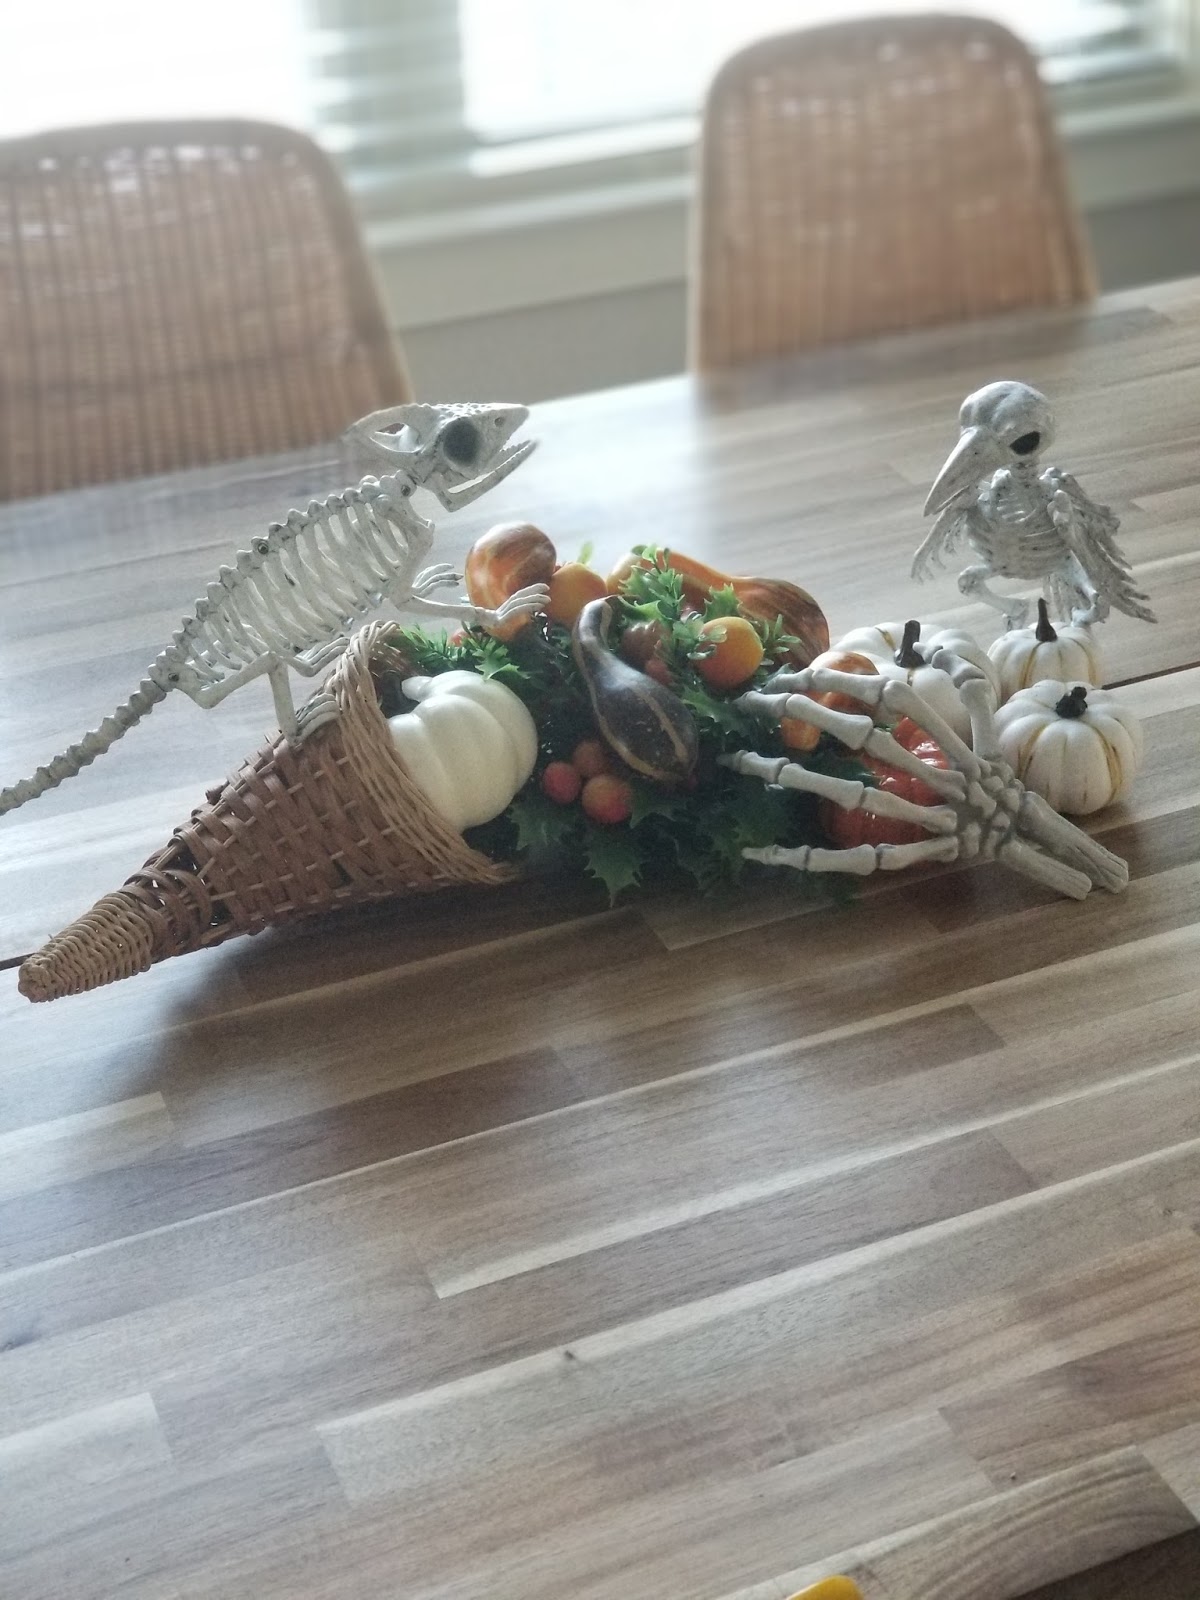
Also, for the bonus round, check out the quick tablescape that I created. This was definitely a use-what-you-have-on-hand creation. I purchased a cornucopia in the summer time with intentions of using it during the fall months at some point or another. I paired it the with pumpkins and skull babies that I had in the attic, and just like that... a small Halloween cornucopia moment.

I may find a way to remix it when Thanksgiving rolls around. Of course just taking the creatures away would suffice for the next holiday. I'll see what I can do and get back to you. Also, at some point I'll get window treatments for the dining area... I'll keep you posted on that too!
Thanks for stopping by! Are you doing any fall decorating in you place? Tell me about it in a comment below! Better yet, a picture's worth a thousand words! If you're on Instagram tag me @rajaune or use the hastag #chiclittleme :)
Hey Guys! Halloween is upon us, and I figured that there was no time like the present than to share with you the simple fall updates that did for the fireplace. It's a fall fireplace face lift for less than $5 - say that five times fast! :)
Now if you remember my fall refresh from last year, you'll know that I'm not really the "decorating for Halloween" kind of gal. I typically like to through in a few fall accents (copper, orange, black and white), pumpkin or two, and a banner. This year, I thought I'd try something different. I wondered what our colorful happy space would look like with a little "spook" thrown in. To achieve this look, I went no further than my attic for some of last year's pumpkins, and of course Target for a 1$ spider web and a large $3 spider.
Side note: Can we just talk about how long our pathos is getting? I feel like such a proud plant momma! Also my copper plant holders are just begging to get filled with more plant-y goodness, but I'm unsure about what species of plants I want to use. Do you have any house plants that you swear by? Any and all suggestions are totally welcome.
Instead of going with several small spiders, I thought to only do one large spider for 3 reasons:
1. The web looked large enough to be created by one HUGE spider
2. Honestly, one spider freaked me out enough
3. In a moment of panic or delusion I could always discern whether or not this was fake.
It's so weird because it creates just enough tension emotionally for it to be effective. I'm a little thrown off every time I come into the room. In short, I pray I never see a spider this large in my home.
Fun fact, when you rotate this Goodwill painting 180 degrees you still see a man in a hat. It's crazy. And once you see it, you can't un-see it. THANKS BRANDON! The copper candle holders were also a Target steal from last year that I snagged from my coffee table.
To apply the web, I just started at the top corner of the large artwork and worked my way down spreading the cotton as thin as possible. It's was honestly pretty simple. It stuck remarkably well to the moulding of the fireplace. I was pretty pleased for 5-7 minutes of effort. :)
Also, for the bonus round, check out the quick tablescape that I created. This was definitely a use-what-you-have-on-hand creation. I purchased a cornucopia in the summer time with intentions of using it during the fall months at some point or another. I paired it the with pumpkins and skull babies that I had in the attic, and just like that... a small Halloween cornucopia moment.
I may find a way to remix it when Thanksgiving rolls around. Of course just taking the creatures away would suffice for the next holiday. I'll see what I can do and get back to you. Also, at some point I'll get window treatments for the dining area... I'll keep you posted on that too!
Thanks for stopping by! Are you doing any fall decorating in you place? Tell me about it in a comment below! Better yet, a picture's worth a thousand words! If you're on Instagram tag me @rajaune or use the hastag #chiclittleme :)
Lately I've been doing my best to keep my energy up so that I feel in the decorating mood after work. Frankly, my job can be so mentally and physically challenging, that it's a miracle when I can cook dinner and take a shower in the evenings. But I've been doing my best, and there have been quite a few changes in our place since my last house update. Check it out!

First up, we upgraded our West Elm Cooper Sofa to an IKEA Stockholm sofa (originally $999, down to $599). And no, I didn't misspeak when I said upgrade, I really meant it. Yes, it is indeed possible to upgrade from West Elm to IKEA. You see, Cooper served us well (for 7 years in fact), but truly it's more of a shallow, tight back sitting sofa, and not a lounging sofa. It had a white cotton cover with a tailored skirt that was great for washing, but the sofa underneath was a simple base covered in muslin, and supported with plastic legs. Cooper was doing just fine, until one day I noticed that the right front leg was bent and began to rock the sofa whenever you graced it with your backside. I suppose that I plopped down on it one too many times because Cooper was over it! And this happened at the exact same time that the Sandbacka Green Stockholm Sofa went on sale. Coincidence? I think not.

Our new sofa is super deep with zippered enclosures, loose back and seat cushions that can be flipped and rearranged, is covered in the most luxurious green velvet, and has solid walnut legs! It's definitely a show-stopper.
And before you say, "Hey Rae, a green sofa... really?" I say, "Hello, have we met?"
I fall hard for color, and this baby had just the right amount of sass to land in our living room. Also, this totally isn't our first foray into bold-colored sofas. Remember the our CB2 Movie Sofa? Brandon and I are definitely not afraid to choose statement pieces that pack a decorating punch. In fact, I'd say that we're quite the color-confident couple!
And before you say, "Hey Rae, a green sofa... really?" I say, "Hello, have we met?"
I fall hard for color, and this baby had just the right amount of sass to land in our living room. Also, this totally isn't our first foray into bold-colored sofas. Remember the our CB2 Movie Sofa? Brandon and I are definitely not afraid to choose statement pieces that pack a decorating punch. In fact, I'd say that we're quite the color-confident couple!
And while we're on the topic of the Movie Sofa, it too needs to be replaced because it's ripping at the seams (it lacks a knife or welt edge; a true flaw in its design). It's a shame because we love our Movie Sofa, but I'm sure that I won't have a problem finding a suitable replacement. :)
I'm loving the new living room sofa, but the frame is pretty high, which actually dwarfs our current accent tables. Therefore, I'm on the hunt for higher accent tables to flank either side. Around 24" in height would be perfect. But don't worry. I'll let you know when I find something!

If you follow me on Instagram, you've probably seen our new bar cabinet. And if you're new to 'chic little me', just believe me when I say that I probably have a bigger vintage decanter collection than anyone you've ever met. After much contemplation, and to the dismay of some friends, I decided that the collection's permanent home would be behind closed doors. Initially I wanted to show it off, but the dust is crazy real. I also contemplated on placing them behind glass doors, but I just couldn't find a glass door cabinet that I really loved, and honestly I just wanted to minimize the amount of visual stimulation in the living room. That's the thing with having a proclivity towards bright colors, you have to know when to let the eye rest. But I must say that it's pretty awesome when we have guests and I start pulling decanters out for drinks. The ooohhhs and ahhhhs never get old. Nothing wrong with being classy; I always say.
In fact, I think that my next project will be organizing the inside shelving with lighting and the drawers with napkins, candles, and other entertaining accouterments. P.S. The world's biggest cocktail shaker was a gift from my Dad and stepmom. First I was thinking, "What kind of drinker do you think I am?" Then I figured it WOULD save me a lot of time, so I guess I'm okay with the message that it sends.

Oh, and did I mention that we got a new dining room table? It's quite amazing, and it's now the centerpiece of the entire main floor! It's the IKEA Skogsta Dining Table and it's solid acacia. Of course when you change the star player, you have to switch up your game, so I'm planning a little dining refresh soon by purchasing new chairs to replace our current ones. Definitely stay tuned for that!

I've also managed to finally hang our CB2 whirly hanging tealight candle holders in our entry. Instead of using candles, I ordered air plants on Amazon, along with moss and fertilizer.

So far everything is doing well. I did have a casualty with the smallest one, but it was mostly because I got lazy and forgot to dunk them one week (they need to soak for 30 minutes every week to stay healthy.) Otherwise, everything has gone swimmingly.

Speaking of the entry, you probably noticed that there is some new kinetic energy going on near the front door! Well, since the opposite wall had a occasional table and "all the things" accessory-wise, I decided to keep this wall pretty devoid of stuff, yet I still wanted a POW when you walked through the door. I achieved this by using Scotch Expressions Washi Tape that I picked up from Target for $2.99 a roll. I ended up using 2 full rolls for this project. And no, I had no plan, I just knew that I wanted intersecting lines. I did have to slow myself down a bit to make sure the lines were relatively straight, but it took only about 30 minutes to execute. I let the tape overlap with the ceiling and corners, then later went back with an Exacto knife and trimmed the extra bits.

I know the pattern's not everyone's cup of tea, but for $6 plus tax I love it! And the best part is if I ever get tired of it, the tape peels right off with no residue! So no harm done. I ran my fingers over the tape the day after I installed it, and it hasn't lifted at all. It really looks like a wall covering close up and you'd never guess that it was tape. I think it catches visitors off guard when they come in, but they usually comment on how they think it's pretty cool. Our townhouse is pretty traditional from the outside, but people know from the moment they walk in the door who they're dealing with!


On the adjacent column, I chose to stack two Tjusig hangers for hats, purses, scarves, coats, etc. After going back and forth, I decided that too many hooks on that wall would take away from the pattern that was making me love the nook in the first place. From the living room, they can barely be seen. We just put them up last week, so I'm pumped to have the first guests use them when they come over.

If you remember the post where I talked about bedside sconces, we pulled the trigger some months ago and mounted Tived lighting behind the bed. It makes reading in bed 100 times easier, and I really can't see any of our future master bedrooms not having them. It's totally worth the small investment if you love to read in bed, or just desire a little bit of ambiance. We use them every single night. I highly recommend them!
Well that's it for today, Folks. So what do you think? Are you a believer in the "it's a marathon, not a sprint" mantra when it comes to furnishing and decorating a home? What are you currently working on in your place? Let me know! I love to talk ideas!
Lately I've been doing my best to keep my energy up so that I feel in the decorating mood after work. Frankly, my job can be so mentally and physically challenging, that it's a miracle when I can cook dinner and take a shower in the evenings. But I've been doing my best, and there have been quite a few changes in our place since my last house update. Check it out!
First up, we upgraded our West Elm Cooper Sofa to an IKEA Stockholm sofa (originally $999, down to $599). And no, I didn't misspeak when I said upgrade, I really meant it. Yes, it is indeed possible to upgrade from West Elm to IKEA. You see, Cooper served us well (for 7 years in fact), but truly it's more of a shallow, tight back sitting sofa, and not a lounging sofa. It had a white cotton cover with a tailored skirt that was great for washing, but the sofa underneath was a simple base covered in muslin, and supported with plastic legs. Cooper was doing just fine, until one day I noticed that the right front leg was bent and began to rock the sofa whenever you graced it with your backside. I suppose that I plopped down on it one too many times because Cooper was over it! And this happened at the exact same time that the Sandbacka Green Stockholm Sofa went on sale. Coincidence? I think not.
Our new sofa is super deep with zippered enclosures, loose back and seat cushions that can be flipped and rearranged, is covered in the most luxurious green velvet, and has solid walnut legs! It's definitely a show-stopper.
And before you say, "Hey Rae, a green sofa... really?" I say, "Hello, have we met?"
I fall hard for color, and this baby had just the right amount of sass to land in our living room. Also, this totally isn't our first foray into bold-colored sofas. Remember the our CB2 Movie Sofa? Brandon and I are definitely not afraid to choose statement pieces that pack a decorating punch. In fact, I'd say that we're quite the color-confident couple!
And before you say, "Hey Rae, a green sofa... really?" I say, "Hello, have we met?"
I fall hard for color, and this baby had just the right amount of sass to land in our living room. Also, this totally isn't our first foray into bold-colored sofas. Remember the our CB2 Movie Sofa? Brandon and I are definitely not afraid to choose statement pieces that pack a decorating punch. In fact, I'd say that we're quite the color-confident couple!
And while we're on the topic of the Movie Sofa, it too needs to be replaced because it's ripping at the seams (it lacks a knife or welt edge; a true flaw in its design). It's a shame because we love our Movie Sofa, but I'm sure that I won't have a problem finding a suitable replacement. :)
I'm loving the new living room sofa, but the frame is pretty high, which actually dwarfs our current accent tables. Therefore, I'm on the hunt for higher accent tables to flank either side. Around 24" in height would be perfect. But don't worry. I'll let you know when I find something!
If you follow me on Instagram, you've probably seen our new bar cabinet. And if you're new to 'chic little me', just believe me when I say that I probably have a bigger vintage decanter collection than anyone you've ever met. After much contemplation, and to the dismay of some friends, I decided that the collection's permanent home would be behind closed doors. Initially I wanted to show it off, but the dust is crazy real. I also contemplated on placing them behind glass doors, but I just couldn't find a glass door cabinet that I really loved, and honestly I just wanted to minimize the amount of visual stimulation in the living room. That's the thing with having a proclivity towards bright colors, you have to know when to let the eye rest. But I must say that it's pretty awesome when we have guests and I start pulling decanters out for drinks. The ooohhhs and ahhhhs never get old. Nothing wrong with being classy; I always say.
In fact, I think that my next project will be organizing the inside shelving with lighting and the drawers with napkins, candles, and other entertaining accouterments. P.S. The world's biggest cocktail shaker was a gift from my Dad and stepmom. First I was thinking, "What kind of drinker do you think I am?" Then I figured it WOULD save me a lot of time, so I guess I'm okay with the message that it sends.
Oh, and did I mention that we got a new dining room table? It's quite amazing, and it's now the centerpiece of the entire main floor! It's the IKEA Skogsta Dining Table and it's solid acacia. Of course when you change the star player, you have to switch up your game, so I'm planning a little dining refresh soon by purchasing new chairs to replace our current ones. Definitely stay tuned for that!
I've also managed to finally hang our CB2 whirly hanging tealight candle holders in our entry. Instead of using candles, I ordered air plants on Amazon, along with moss and fertilizer.
So far everything is doing well. I did have a casualty with the smallest one, but it was mostly because I got lazy and forgot to dunk them one week (they need to soak for 30 minutes every week to stay healthy.) Otherwise, everything has gone swimmingly.
Speaking of the entry, you probably noticed that there is some new kinetic energy going on near the front door! Well, since the opposite wall had a occasional table and "all the things" accessory-wise, I decided to keep this wall pretty devoid of stuff, yet I still wanted a POW when you walked through the door. I achieved this by using Scotch Expressions Washi Tape that I picked up from Target for $2.99 a roll. I ended up using 2 full rolls for this project. And no, I had no plan, I just knew that I wanted intersecting lines. I did have to slow myself down a bit to make sure the lines were relatively straight, but it took only about 30 minutes to execute. I let the tape overlap with the ceiling and corners, then later went back with an Exacto knife and trimmed the extra bits.
I know the pattern's not everyone's cup of tea, but for $6 plus tax I love it! And the best part is if I ever get tired of it, the tape peels right off with no residue! So no harm done. I ran my fingers over the tape the day after I installed it, and it hasn't lifted at all. It really looks like a wall covering close up and you'd never guess that it was tape. I think it catches visitors off guard when they come in, but they usually comment on how they think it's pretty cool. Our townhouse is pretty traditional from the outside, but people know from the moment they walk in the door who they're dealing with!
On the adjacent column, I chose to stack two Tjusig hangers for hats, purses, scarves, coats, etc. After going back and forth, I decided that too many hooks on that wall would take away from the pattern that was making me love the nook in the first place. From the living room, they can barely be seen. We just put them up last week, so I'm pumped to have the first guests use them when they come over.
If you remember the post where I talked about bedside sconces, we pulled the trigger some months ago and mounted Tived lighting behind the bed. It makes reading in bed 100 times easier, and I really can't see any of our future master bedrooms not having them. It's totally worth the small investment if you love to read in bed, or just desire a little bit of ambiance. We use them every single night. I highly recommend them!
Well that's it for today, Folks. So what do you think? Are you a believer in the "it's a marathon, not a sprint" mantra when it comes to furnishing and decorating a home? What are you currently working on in your place? Let me know! I love to talk ideas!
Happy Fall, Everyone! It seems as though every design blogger's favorite season is finally here! (Well, my favorite season is actually summer, but I can get down with Fall because it pretty much still feels like summer here in Georgia.) Today I am sharing how I prepared my space for Fall, and how surprisingly easy it was do so! If it's not your first rodeo here on chic little me, you know that I am no stranger to color. Honestly my commitment to color is much more indicative of Spring and Summer, but I could never neutralize my home to accommodate seasonal decor! Instead, I came up with 3 easy ways to incorporate Fall decor into my home without sacrificing my personal style.


But it is pretty cool to think that we might use it sometime when we don't have guests. Actually, this is the time of year when the dining table will start getting more visitors. Cards Against Humanity, anyone? :)


On the TV console I switched out a few of my accessories for fall-inspired ones.

Each side got a small touch of whimsy without too much commitment.


I also couldn't resist this lizard. His long tail just sold me! I also added a cute, little ceramic pumpkin for balance and good measure.

My glass skeleton head is normally somewhere close by year-round, but right now he looks like he has just a little more purpose.


Here I added a touch of orange, more clippings from the yard, and a baby pumpkin.

The claw had to come home with me! It might actually move all over the house next month depending on how mischievous I feel.


Sheepskins are also a nice touch. Not only do they add character and personality to a piece of furniture, you can also cuddle up with them. Oh, and Chip's favorite thing in the world is being underneath a blanket or sheepskin. See how she's plotting her next move?

Oh, and there's the matter of adding a little something special to the floor.

We recently added a cowhide to the entry. We pretty much decided on this type of floor covering for three reasons. One, it protects the floor from further scratches. Chips gets really excited when we let her out of her crate, and she accidentally scratches everything in her path on the way to the door. Two, the space opens up in a such a way that a regular square, or rectangular rug just didn't do anything for the space. It's quite amazing though, because the rug fits perfectly within a 1/16" of the base boards, so I guess we picked the right cow! Three, it warms up the space and makes the entry feel a little less naked, which is exactly what you want during the end of the year when you have the most visitors!
How to integrate Fall decor in 3 easy steps...
Step #1 Add Mixed Metals

Silver, copper, and brass not only go with just about any decor, they also add a little luxe to any space. Not only are they totally appropriate for Fall, they'll also translate well into Winter, and blend with any holiday decorations that we add in another month or so.

I've been in love with the idea of a studded pumpkin since last year, and I'm so glad that I finally pulled the trigger. It's so sassy! I paired it with a clipping from the tree outside our of dining room window. I decided not to add water to the vase so that the leaves will eventually start to change to those pretty colors that we all love!

For my dining table I decided to keep it simple and go with an asymmetrical arrangement using mirrors that I already had on hand and a copper candle. Admittedly we hardly ever eat there. Sadly we're eat-in-front-of-the-TV and collect-miscellaneous-mail-and-packages-on-the-dining-table sort of people.

But it is pretty cool to think that we might use it sometime when we don't have guests. Actually, this is the time of year when the dining table will start getting more visitors. Cards Against Humanity, anyone? :)

Step #2 Add Whimsy

I've never been one to purchase seasonal decorations (outside of Christmas) for fear of feeling a little cheesy. But one of the coolest things about owning your own home is being able to decorate it for the changing seasons, and experimenting whenever the mood strikes. This year I decided that I could at least give it a try. I managed to stay on a small budget (about $30) and attempted to add a few touches without it feeling too Halloween-ish. I started with a very cute, inexpensive pennant banner to hang on the fireplace. It also has gold edges, which reinforces the previous 'mixed metals' category. I appreciate that it's subtle, but also adds a little flair to an already very vibrant vignette.

Speaking of vignette, I also added a few new pieces to the mantle. I saw this adorable sparrow skeleton and I just couldn't resist. I paired him with a little cream pumpkin, and now he looks pretty happy in his new place of honor.

On the TV console I switched out a few of my accessories for fall-inspired ones.


Here I took a simple collection of vases and filled them with a variety of pumpkins. Caesar looks pleased.

I also couldn't resist this lizard. His long tail just sold me! I also added a cute, little ceramic pumpkin for balance and good measure.

My glass skeleton head is normally somewhere close by year-round, but right now he looks like he has just a little more purpose.

My decanter collection is a constant work in progress. It seems as though the more I accessories I add to it, the busier it gets, so I'm trying to show restraint. In case you were wondering, There are 20 shown here. I've already tried pairing them down. Now I'm afraid that I've hit my limit. I'm currently on the lookout for a better display solution though. But I'll save my ideas for another post. :)

Here I added a touch of orange, more clippings from the yard, and a baby pumpkin.

The claw had to come home with me! It might actually move all over the house next month depending on how mischievous I feel.
Step # 3 Add Warmth

When I think about colder weather I immediately want to cover up! That's why I made sure to have blankets that are easily accessible when I'm lounging and watching TV. I like to keep one on the ottoman, as well as one the arm of the sofa just in case I feel a draft. I don't change my pillow covers too often, but when I do, I always make sure that I coordinate them with the perfect throw.

This time of year, the sofa becomes your second home, am I right? With all the new Fall TV shows, and the chilly weather, I like to craft a cocoon so cozy that my feet never have to hit the floor!

This time of year, the sofa becomes your second home, am I right? With all the new Fall TV shows, and the chilly weather, I like to craft a cocoon so cozy that my feet never have to hit the floor!

Sheepskins are also a nice touch. Not only do they add character and personality to a piece of furniture, you can also cuddle up with them. Oh, and Chip's favorite thing in the world is being underneath a blanket or sheepskin. See how she's plotting her next move?

Oh, and there's the matter of adding a little something special to the floor.

We recently added a cowhide to the entry. We pretty much decided on this type of floor covering for three reasons. One, it protects the floor from further scratches. Chips gets really excited when we let her out of her crate, and she accidentally scratches everything in her path on the way to the door. Two, the space opens up in a such a way that a regular square, or rectangular rug just didn't do anything for the space. It's quite amazing though, because the rug fits perfectly within a 1/16" of the base boards, so I guess we picked the right cow! Three, it warms up the space and makes the entry feel a little less naked, which is exactly what you want during the end of the year when you have the most visitors!
So that's it folks, that's how I refreshed our place for fall. Are you adding or subtracting anything from your decor during this time of year? Do you follow a mixed metals + whimsy + warmth strategy in your home, or have you developed your own method? Let me know!
Happy Fall, Everyone! It seems as though every design blogger's favorite season is finally here! (Well, my favorite season is actually summer, but I can get down with Fall because it pretty much still feels like summer here in Georgia.) Today I am sharing how I prepared my space for Fall, and how surprisingly easy it was do so! If it's not your first rodeo here on chic little me, you know that I am no stranger to color. Honestly my commitment to color is much more indicative of Spring and Summer, but I could never neutralize my home to accommodate seasonal decor! Instead, I came up with 3 easy ways to incorporate Fall decor into my home without sacrificing my personal style.
But it is pretty cool to think that we might use it sometime when we don't have guests. Actually, this is the time of year when the dining table will start getting more visitors. Cards Against Humanity, anyone? :)
On the TV console I switched out a few of my accessories for fall-inspired ones.
Each side got a small touch of whimsy without too much commitment.
I also couldn't resist this lizard. His long tail just sold me! I also added a cute, little ceramic pumpkin for balance and good measure.
My glass skeleton head is normally somewhere close by year-round, but right now he looks like he has just a little more purpose.
Here I added a touch of orange, more clippings from the yard, and a baby pumpkin.
The claw had to come home with me! It might actually move all over the house next month depending on how mischievous I feel.
Sheepskins are also a nice touch. Not only do they add character and personality to a piece of furniture, you can also cuddle up with them. Oh, and Chip's favorite thing in the world is being underneath a blanket or sheepskin. See how she's plotting her next move?
Oh, and there's the matter of adding a little something special to the floor.
We recently added a cowhide to the entry. We pretty much decided on this type of floor covering for three reasons. One, it protects the floor from further scratches. Chips gets really excited when we let her out of her crate, and she accidentally scratches everything in her path on the way to the door. Two, the space opens up in a such a way that a regular square, or rectangular rug just didn't do anything for the space. It's quite amazing though, because the rug fits perfectly within a 1/16" of the base boards, so I guess we picked the right cow! Three, it warms up the space and makes the entry feel a little less naked, which is exactly what you want during the end of the year when you have the most visitors!
How to integrate Fall decor in 3 easy steps...
Step #1 Add Mixed Metals
Silver, copper, and brass not only go with just about any decor, they also add a little luxe to any space. Not only are they totally appropriate for Fall, they'll also translate well into Winter, and blend with any holiday decorations that we add in another month or so.
I've been in love with the idea of a studded pumpkin since last year, and I'm so glad that I finally pulled the trigger. It's so sassy! I paired it with a clipping from the tree outside our of dining room window. I decided not to add water to the vase so that the leaves will eventually start to change to those pretty colors that we all love!
For my dining table I decided to keep it simple and go with an asymmetrical arrangement using mirrors that I already had on hand and a copper candle. Admittedly we hardly ever eat there. Sadly we're eat-in-front-of-the-TV and collect-miscellaneous-mail-and-packages-on-the-dining-table sort of people.
But it is pretty cool to think that we might use it sometime when we don't have guests. Actually, this is the time of year when the dining table will start getting more visitors. Cards Against Humanity, anyone? :)
Step #2 Add Whimsy
I've never been one to purchase seasonal decorations (outside of Christmas) for fear of feeling a little cheesy. But one of the coolest things about owning your own home is being able to decorate it for the changing seasons, and experimenting whenever the mood strikes. This year I decided that I could at least give it a try. I managed to stay on a small budget (about $30) and attempted to add a few touches without it feeling too Halloween-ish. I started with a very cute, inexpensive pennant banner to hang on the fireplace. It also has gold edges, which reinforces the previous 'mixed metals' category. I appreciate that it's subtle, but also adds a little flair to an already very vibrant vignette.
Speaking of vignette, I also added a few new pieces to the mantle. I saw this adorable sparrow skeleton and I just couldn't resist. I paired him with a little cream pumpkin, and now he looks pretty happy in his new place of honor.
On the TV console I switched out a few of my accessories for fall-inspired ones.
Here I took a simple collection of vases and filled them with a variety of pumpkins. Caesar looks pleased.
I also couldn't resist this lizard. His long tail just sold me! I also added a cute, little ceramic pumpkin for balance and good measure.
My glass skeleton head is normally somewhere close by year-round, but right now he looks like he has just a little more purpose.
My decanter collection is a constant work in progress. It seems as though the more I accessories I add to it, the busier it gets, so I'm trying to show restraint. In case you were wondering, There are 20 shown here. I've already tried pairing them down. Now I'm afraid that I've hit my limit. I'm currently on the lookout for a better display solution though. But I'll save my ideas for another post. :)
Here I added a touch of orange, more clippings from the yard, and a baby pumpkin.
The claw had to come home with me! It might actually move all over the house next month depending on how mischievous I feel.
Step # 3 Add Warmth
When I think about colder weather I immediately want to cover up! That's why I made sure to have blankets that are easily accessible when I'm lounging and watching TV. I like to keep one on the ottoman, as well as one the arm of the sofa just in case I feel a draft. I don't change my pillow covers too often, but when I do, I always make sure that I coordinate them with the perfect throw.
This time of year, the sofa becomes your second home, am I right? With all the new Fall TV shows, and the chilly weather, I like to craft a cocoon so cozy that my feet never have to hit the floor!
This time of year, the sofa becomes your second home, am I right? With all the new Fall TV shows, and the chilly weather, I like to craft a cocoon so cozy that my feet never have to hit the floor!
Sheepskins are also a nice touch. Not only do they add character and personality to a piece of furniture, you can also cuddle up with them. Oh, and Chip's favorite thing in the world is being underneath a blanket or sheepskin. See how she's plotting her next move?
Oh, and there's the matter of adding a little something special to the floor.
We recently added a cowhide to the entry. We pretty much decided on this type of floor covering for three reasons. One, it protects the floor from further scratches. Chips gets really excited when we let her out of her crate, and she accidentally scratches everything in her path on the way to the door. Two, the space opens up in a such a way that a regular square, or rectangular rug just didn't do anything for the space. It's quite amazing though, because the rug fits perfectly within a 1/16" of the base boards, so I guess we picked the right cow! Three, it warms up the space and makes the entry feel a little less naked, which is exactly what you want during the end of the year when you have the most visitors!
So that's it folks, that's how I refreshed our place for fall. Are you adding or subtracting anything from your decor during this time of year? Do you follow a mixed metals + whimsy + warmth strategy in your home, or have you developed your own method? Let me know!

We already owned the sofa, the Blu Dot tubular chair, the CB2 coffee table, and Home Goods ottomans. You may remember them from our former apartment. The ottomans were previously used as side tables with the addition of square mirrors for a flat surface. Here they are used for extra seating, and I'm surprised at how often Brandon and I use them when we're having quick conversations with one another / laughing, joking and talking general nonsense. The two side tables on either side of the sofa are from IKEA, as well as the floor lamps. The table lamps are Target, and the small Noguchi-inspired table is from an antique shop in my home town, Albany, GA.

The color scheme was actually inspired by these cool pillow covers that I ordered from H&M. If you haven't checked out their textiles yet, you're simply missing out! They are cotton with a zipper enclosure, and are usually priced between $5.95 and $24.99. I use the Fjadrar inserts from IKEA to stuff them. I ordered two sets of each pattern and went cray cray with it. I eventually pulled back on the pattern and added a solid Sanela cover from IKEA to tone things down a bit. I kind of laughed at myself when I typed that. Me? Tone things down???

Next I found this amazing armchair at... you guessed it. Goodwill!!!

When I saw the flame stitch I knew I just HAD to have it. I mean, for around $20 I really couldn't say no. Of course Baby Bug carried it home like a champ!!! She fit perfectly with absolutely no room to spare. I was proud momma!

I followed Carmeon's advice on Cohesive Randomness about using Folex carpet cleaner for a quick upholstery clean alternative. Then I eventually followed up with an all-over spritz of Febreeze. You can see the dampness around the edges of the muslin from the cleaner. I even managed to find some extra goodies while cleaning this beauty up.

I was a little hesitant to put her in front of the french doors to the deck, but it just so happens that she actually has wheels instead of legs, so whenever we need extra room we just roll her to side.

After the chair, I found this amazing Havnso rug that I just couldn't go on living without.

It was huge, colorful, super easy to clean (which was absolutely necessary with our little pup) and only $99. Upon our first meeting it was pretty much a done deal!
It took me about 6 months to finally decide how I wanted to address the wall space above the sofa. I could have easily hung a big piece of art and been done with it, but unfortunately I just wasn't satisfied with that option. I kept thinking about how normal that option was, and how everyone has a big piece of art or a mirror above their sofa. Not to knock that solution of course. It's a great solution! It's super easy, and makes a big impact. It's just that I've done it before, and I was pretty bored with it. I wanted to push myself to try something different. There was so much symmetry going in the living room with the side tables, lamps, and windows that I knew I wanted something a little atypical.

I had been collecting baskets from Goodwill and I wanted to try and incorporate them into something eclectic. Unfortunately, when I put them all together, it was pretty busy. Mind you, everything in this space is multicolored, so I needed to pair down a bit and make some pointed decisions. The weird thing is that I had acquired three baskets that were the same color scheme, so I knew my subconscious was trying to tell me something. Below is my attempt to narrow down to my favorite.

I really wanted something asymmetrical, so I started searching around and found a HUGE decorative wall medallion from Target. I waited until it went on sale of course!

Then it all sort of came together one November evening. After playing with the layout, I realized that it would be best to use just one of the colorful baskets, and keep the rest neutral, so that the textiles could have a larger presence.

So here we are today!

I like how fun the space is, and it definitely puts a smile on my face whenever I get home. The accessories get switched out often, but for the most part I like to keep it realistic. We have lots of remotes, we eat at our coffee table almost every night, and we have a dog that sheds (a lot), so right now this works for us.

I wanted to share this with you to let you know that it's okay to let a room come together organically over time, and you shouldn't feel bad for not completely assembling a space the first week you move in. I took my time, and though it was frustrating at times, I kept at it and found something that worked for me (and my budget). I pushed myself for something unique, and that's what I ended up with. This isn't even my first round, more like my third. You can see the first iteration here. I still have some ways to go - window treatments and more storage, but for now it's a good start. Stuck on how to start pulling your space together? Well...
Stumped when it comes to choosing a color palette? I often wait for the perfect textile to use as inspiration. In my case, the middle turquoise pillow on the sofa was my muse, as well as the Goodwill art on my fireplace.
Find a layout that works for your space and how you actually live.
Create a conversational layout that allows you to entertain AND watch television. Contrary to popular belief, both activities are achievable in one living room. I find that people tend to push everything against the wall, but you don't have to! In fact, you shouldn't. Don't be afraid to float chairs, ottomans, or even your sofa to create a functional layout and good flow. The ottomans in our space are floating in front of the tv, but they don't obstruct the view to the screen.
Ask yourself, "Can I look my guests in the face when they're talking? Does everyone have a surface nearby to sit a drink? Can I easily walk between furniture without bumping into anything?" Answering those questions will get you closer to a layout that works. I like to read in the living room, but I also loathe overhead lighting, so I added task lighting (reading floor lamps) and ambient lighting (table lamps) right next to one another when usually they would be spread throughout the room. Who says you can't? Do what works for you!
Add in some great second-hand pieces that complement your decor.
The flame stitch chair and Noguchi-esque side table were very inexpensive finds that make me love my room even more. As far as I'm concerned, I 'm not going to tour anyone else's home (virtually or in person) and see them. They also add soul and personality to a room that is full of new-looking furniture. Best thing is, if you don't love them after a while, you can always pass the pieces on without feeling guilty that you put a lot of money into them.
Don't be afraid to mix things up a little.
Our space is pretty symmetrical, but not all the pieces are identical. Here, let scale be your guide. Notice how I have two chairs that are a different design, but they are similar in scale. Same goes for the side tables on either side of the sofa. They are roughly the same height, but a completely different design. Mixing things up helps your eye keep moving around the room, and overall adds more interest.
So what do you think? Do you have a space you just started, or need a little help getting some ideas rolling? Email me with some pictures, and I'll brainstorm with you! :)
We already owned the sofa, the Blu Dot tubular chair, the CB2 coffee table, and Home Goods ottomans. You may remember them from our former apartment. The ottomans were previously used as side tables with the addition of square mirrors for a flat surface. Here they are used for extra seating, and I'm surprised at how often Brandon and I use them when we're having quick conversations with one another / laughing, joking and talking general nonsense. The two side tables on either side of the sofa are from IKEA, as well as the floor lamps. The table lamps are Target, and the small Noguchi-inspired table is from an antique shop in my home town, Albany, GA.
The color scheme was actually inspired by these cool pillow covers that I ordered from H&M. If you haven't checked out their textiles yet, you're simply missing out! They are cotton with a zipper enclosure, and are usually priced between $5.95 and $24.99. I use the Fjadrar inserts from IKEA to stuff them. I ordered two sets of each pattern and went cray cray with it. I eventually pulled back on the pattern and added a solid Sanela cover from IKEA to tone things down a bit. I kind of laughed at myself when I typed that. Me? Tone things down???
Next I found this amazing armchair at... you guessed it. Goodwill!!!
When I saw the flame stitch I knew I just HAD to have it. I mean, for around $20 I really couldn't say no. Of course Baby Bug carried it home like a champ!!! She fit perfectly with absolutely no room to spare. I was proud momma!
I followed Carmeon's advice on Cohesive Randomness about using Folex carpet cleaner for a quick upholstery clean alternative. Then I eventually followed up with an all-over spritz of Febreeze. You can see the dampness around the edges of the muslin from the cleaner. I even managed to find some extra goodies while cleaning this beauty up.
I was a little hesitant to put her in front of the french doors to the deck, but it just so happens that she actually has wheels instead of legs, so whenever we need extra room we just roll her to side.
After the chair, I found this amazing Havnso rug that I just couldn't go on living without.
It was huge, colorful, super easy to clean (which was absolutely necessary with our little pup) and only $99. Upon our first meeting it was pretty much a done deal!
It took me about 6 months to finally decide how I wanted to address the wall space above the sofa. I could have easily hung a big piece of art and been done with it, but unfortunately I just wasn't satisfied with that option. I kept thinking about how normal that option was, and how everyone has a big piece of art or a mirror above their sofa. Not to knock that solution of course. It's a great solution! It's super easy, and makes a big impact. It's just that I've done it before, and I was pretty bored with it. I wanted to push myself to try something different. There was so much symmetry going in the living room with the side tables, lamps, and windows that I knew I wanted something a little atypical.
I had been collecting baskets from Goodwill and I wanted to try and incorporate them into something eclectic. Unfortunately, when I put them all together, it was pretty busy. Mind you, everything in this space is multicolored, so I needed to pair down a bit and make some pointed decisions. The weird thing is that I had acquired three baskets that were the same color scheme, so I knew my subconscious was trying to tell me something. Below is my attempt to narrow down to my favorite.
I really wanted something asymmetrical, so I started searching around and found a HUGE decorative wall medallion from Target. I waited until it went on sale of course!
Then it all sort of came together one November evening. After playing with the layout, I realized that it would be best to use just one of the colorful baskets, and keep the rest neutral, so that the textiles could have a larger presence.
So here we are today!
I like how fun the space is, and it definitely puts a smile on my face whenever I get home. The accessories get switched out often, but for the most part I like to keep it realistic. We have lots of remotes, we eat at our coffee table almost every night, and we have a dog that sheds (a lot), so right now this works for us.
I wanted to share this with you to let you know that it's okay to let a room come together organically over time, and you shouldn't feel bad for not completely assembling a space the first week you move in. I took my time, and though it was frustrating at times, I kept at it and found something that worked for me (and my budget). I pushed myself for something unique, and that's what I ended up with. This isn't even my first round, more like my third. You can see the first iteration here. I still have some ways to go - window treatments and more storage, but for now it's a good start. Stuck on how to start pulling your space together? Well...
Stumped when it comes to choosing a color palette? I often wait for the perfect textile to use as inspiration. In my case, the middle turquoise pillow on the sofa was my muse, as well as the Goodwill art on my fireplace.
Find a layout that works for your space and how you actually live.
Create a conversational layout that allows you to entertain AND watch television. Contrary to popular belief, both activities are achievable in one living room. I find that people tend to push everything against the wall, but you don't have to! In fact, you shouldn't. Don't be afraid to float chairs, ottomans, or even your sofa to create a functional layout and good flow. The ottomans in our space are floating in front of the tv, but they don't obstruct the view to the screen.
Ask yourself, "Can I look my guests in the face when they're talking? Does everyone have a surface nearby to sit a drink? Can I easily walk between furniture without bumping into anything?" Answering those questions will get you closer to a layout that works. I like to read in the living room, but I also loathe overhead lighting, so I added task lighting (reading floor lamps) and ambient lighting (table lamps) right next to one another when usually they would be spread throughout the room. Who says you can't? Do what works for you!
Add in some great second-hand pieces that complement your decor.
The flame stitch chair and Noguchi-esque side table were very inexpensive finds that make me love my room even more. As far as I'm concerned, I 'm not going to tour anyone else's home (virtually or in person) and see them. They also add soul and personality to a room that is full of new-looking furniture. Best thing is, if you don't love them after a while, you can always pass the pieces on without feeling guilty that you put a lot of money into them.
Don't be afraid to mix things up a little.
Our space is pretty symmetrical, but not all the pieces are identical. Here, let scale be your guide. Notice how I have two chairs that are a different design, but they are similar in scale. Same goes for the side tables on either side of the sofa. They are roughly the same height, but a completely different design. Mixing things up helps your eye keep moving around the room, and overall adds more interest.
So what do you think? Do you have a space you just started, or need a little help getting some ideas rolling? Email me with some pictures, and I'll brainstorm with you! :)
Subscribe to:
Posts (Atom)


Social Icons