
As expected, our decanter collection is still growing!

I acquired these two from TJ Maxx. The crystal one was around $7, and the green one was $12. I simply couldn't pass them up, especially the green one which Brandon lovingly refers to as our genie bottle lamp. Of course to make room for them I had to remove the orchid, corks, and Missoni candle. Don't worry though. They found a good home on our coffee table.

Eight decanters and counting...

On the other side I've starting collecting some spunky art. I picked up both of these pieces at Goodwill for just a few dollars each. Oh, and the Missoni platter below was also a Goodwill find. People, just keep giving your Target by Missoni pieces away - I'll gladly keep collecting them. :)


As for the vibrant original paintings, keep giving those away too! I'm looking for a third one to round out our mini collection. If I don't find one soon, I may bite the bullet and create one myself. I'm thinking of a black and white abstract, kind of like this one. I can't wait to get them mounted on the wall!

When deciding to turn the occasional table into a bar, I also created the challenge of finding a home for all the other things that no longer live there. Our Tradig bowl was transformed into a funky plant stand. I must admit, I like it much better used this way because I was struggling with how to fill it (we're not fruit bowl people). Plus, it allows our peace lily to get more sunlight since it sits behind our Sig chair. And let's face it, that plant is way more chic now that it's not just sitting on the floor.

The CB2 candle sticks were relocated to the mirror turned tray on our Besta unit. In their honor I decided to add more white and glass to the vignette. I also added the leaves that I saved from last year's Kroger flower bunch. They're totally real, and still very vibrant. It's fall ya'll and I'm finally (reluctantly) embracing it! It seems like all the bloggers I follow love fall, but I'm a true summer girl at heart and could totally do without cold weather. Any tips for getting me into the fall mood?
As expected, our decanter collection is still growing!
I acquired these two from TJ Maxx. The crystal one was around $7, and the green one was $12. I simply couldn't pass them up, especially the green one which Brandon lovingly refers to as our genie bottle lamp. Of course to make room for them I had to remove the orchid, corks, and Missoni candle. Don't worry though. They found a good home on our coffee table.
Eight decanters and counting...
On the other side I've starting collecting some spunky art. I picked up both of these pieces at Goodwill for just a few dollars each. Oh, and the Missoni platter below was also a Goodwill find. People, just keep giving your Target by Missoni pieces away - I'll gladly keep collecting them. :)
As for the vibrant original paintings, keep giving those away too! I'm looking for a third one to round out our mini collection. If I don't find one soon, I may bite the bullet and create one myself. I'm thinking of a black and white abstract, kind of like this one. I can't wait to get them mounted on the wall!
When deciding to turn the occasional table into a bar, I also created the challenge of finding a home for all the other things that no longer live there. Our Tradig bowl was transformed into a funky plant stand. I must admit, I like it much better used this way because I was struggling with how to fill it (we're not fruit bowl people). Plus, it allows our peace lily to get more sunlight since it sits behind our Sig chair. And let's face it, that plant is way more chic now that it's not just sitting on the floor.
The CB2 candle sticks were relocated to the mirror turned tray on our Besta unit. In their honor I decided to add more white and glass to the vignette. I also added the leaves that I saved from last year's Kroger flower bunch. They're totally real, and still very vibrant. It's fall ya'll and I'm finally (reluctantly) embracing it! It seems like all the bloggers I follow love fall, but I'm a true summer girl at heart and could totally do without cold weather. Any tips for getting me into the fall mood?
When I get really bored I start to switch things up. So that's how our Malm occasional table went from a random collection of cute things ...

To a place to pour drinks!


When I was done with this particular vignette, I couldn't help but think it belonged in a CB2 catalog... remember these cubes from here? I definitely like them better stacked.


On the end I placed our ice bucket, wine decanter and bar tools.

I'm so pumped to have some visitors so that we can test it all out. Not bad for things we already had scattered around our crib, huh? Next I would like to remix the artwork and add more height to the wall. I also need to fill in some gaps in the Billy. Wish me luck!

To a place to pour drinks!

Allow me to explain. For the past two years our Billy bookcase has been appointed with the task of housing most of our various bar accoutrements. But a problem arose as I began to collect more vintage decanters from Goodwill, and we started filling them with libations. Reaching up and over other things to take them down started to become a real drag. Instead of shifting everything to the bottom shelf, I decided to relocate our bar ware to the other side of the dining room.

When I was done with this particular vignette, I couldn't help but think it belonged in a CB2 catalog... remember these cubes from here? I definitely like them better stacked.

The middle of the table has our dormant orchid, one of our Missoni by Target candles, and the snack bowl from the kitchen full of corks.

I can't believe that we've collected six decanters so far, and that four out of the six came from Goodwill! The two with the matching finials were sweet Christmas gifts from my in-laws. We feel like such adults! I stole the tray from our office to group them, which just so happened to fit them perfectly. As our collection grows I'm sure I'll have to do some more shifting around, but for now it's kinda cool.

On the end I placed our ice bucket, wine decanter and bar tools.

I'm so pumped to have some visitors so that we can test it all out. Not bad for things we already had scattered around our crib, huh? Next I would like to remix the artwork and add more height to the wall. I also need to fill in some gaps in the Billy. Wish me luck!
When I get really bored I start to switch things up. So that's how our Malm occasional table went from a random collection of cute things ...
To a place to pour drinks!
When I was done with this particular vignette, I couldn't help but think it belonged in a CB2 catalog... remember these cubes from here? I definitely like them better stacked.
On the end I placed our ice bucket, wine decanter and bar tools.
I'm so pumped to have some visitors so that we can test it all out. Not bad for things we already had scattered around our crib, huh? Next I would like to remix the artwork and add more height to the wall. I also need to fill in some gaps in the Billy. Wish me luck!
To a place to pour drinks!
Allow me to explain. For the past two years our Billy bookcase has been appointed with the task of housing most of our various bar accoutrements. But a problem arose as I began to collect more vintage decanters from Goodwill, and we started filling them with libations. Reaching up and over other things to take them down started to become a real drag. Instead of shifting everything to the bottom shelf, I decided to relocate our bar ware to the other side of the dining room.
When I was done with this particular vignette, I couldn't help but think it belonged in a CB2 catalog... remember these cubes from here? I definitely like them better stacked.
The middle of the table has our dormant orchid, one of our Missoni by Target candles, and the snack bowl from the kitchen full of corks.
I can't believe that we've collected six decanters so far, and that four out of the six came from Goodwill! The two with the matching finials were sweet Christmas gifts from my in-laws. We feel like such adults! I stole the tray from our office to group them, which just so happened to fit them perfectly. As our collection grows I'm sure I'll have to do some more shifting around, but for now it's kinda cool.
On the end I placed our ice bucket, wine decanter and bar tools.
I'm so pumped to have some visitors so that we can test it all out. Not bad for things we already had scattered around our crib, huh? Next I would like to remix the artwork and add more height to the wall. I also need to fill in some gaps in the Billy. Wish me luck!
A good percentage of my ideas for our home manifest in my mind for a good while until I finally work up the courage to take the plunge. I had been thinking about making a succulent garden for quite some time, but it wasn't until I saw this quirky footed bowl at work that I decided - this ish is going down! The following isn't really what I'd call a tutorial. It's more of my own discovery process on how to plant something, make it pretty, and hopefully not completely kill it in the process.

So I laid all of my succulents and cacti out and formulated a plan of
attack. I simply wanted the plants in the bowl. Pretty basic, I'll
admit. But I actually couldn't leave them like this...

The first cactus I grabbed literally fell apart in my rubber-gloved hands. All of its little nubs just detached when I separated it from its pot. Now I'm no gardener, but I barely touched it. Once I got over the fact that I was definitely set up for the okey doke, I decided to scrap all the little nubby bits and go with the two pieces that seemed to be okay with staying together.

From there I started adding each plant in circular fashion and packing the soil down as I went to ensure that each plant was sturdy enough not to fall over. Side note: After speaking to a trusted gardening source, I was told that because succulents like to completely dry out before being watered again, it probably would have been in my best interest to put some rocks at the bottom for drainage before packing down the soil. Going forward I'm going to try and be cautious when watering (by spritzing sparingly) and hopefully they'll thrive.

I eventually ended up with this configuration - short succulents and cacti on the outside, and tall aloe in the middle. I used a spoon to gently get the soil where it needed to be without getting poked. I also added a touch of water to clean the plants off, as they got pretty dirty during this process.

Then I added the rocks. I needed a bag-and-a-half to cover everything. I won't lie, the rocks actually make it look finished and pretty special.

So here's what I was left with. Not bad right? It almost looks like I knew what I was doing!

Cactaceae and Succulents: 5 @ $2.99 ea.
Knaster stones: 2 bags @ 89 cents ea.
A new centerpiece for your dining room table - priceless
A good percentage of my ideas for our home manifest in my mind for a good while until I finally work up the courage to take the plunge. I had been thinking about making a succulent garden for quite some time, but it wasn't until I saw this quirky footed bowl at work that I decided - this ish is going down! The following isn't really what I'd call a tutorial. It's more of my own discovery process on how to plant something, make it pretty, and hopefully not completely kill it in the process.
So I laid all of my succulents and cacti out and formulated a plan of
attack. I simply wanted the plants in the bowl. Pretty basic, I'll
admit. But I actually couldn't leave them like this...
The first cactus I grabbed literally fell apart in my rubber-gloved hands. All of its little nubs just detached when I separated it from its pot. Now I'm no gardener, but I barely touched it. Once I got over the fact that I was definitely set up for the okey doke, I decided to scrap all the little nubby bits and go with the two pieces that seemed to be okay with staying together.
From there I started adding each plant in circular fashion and packing the soil down as I went to ensure that each plant was sturdy enough not to fall over. Side note: After speaking to a trusted gardening source, I was told that because succulents like to completely dry out before being watered again, it probably would have been in my best interest to put some rocks at the bottom for drainage before packing down the soil. Going forward I'm going to try and be cautious when watering (by spritzing sparingly) and hopefully they'll thrive.
I eventually ended up with this configuration - short succulents and cacti on the outside, and tall aloe in the middle. I used a spoon to gently get the soil where it needed to be without getting poked. I also added a touch of water to clean the plants off, as they got pretty dirty during this process.
Then I added the rocks. I needed a bag-and-a-half to cover everything. I won't lie, the rocks actually make it look finished and pretty special.
So here's what I was left with. Not bad right? It almost looks like I knew what I was doing!
Cactaceae and Succulents: 5 @ $2.99 ea.
Knaster stones: 2 bags @ 89 cents ea.
A new centerpiece for your dining room table - priceless
This summer I had the amazing opportunity to be the lead designer and project manager for this year's showroom entrance remodel. Every year we remodel the entrance to give visitors a taste of the new year's catalog priority, as well as present a microcosm of what IKEA is about. For fiscal year 14 IKEA is focusing on living with children. Every winter, a set of briefs are sent to every IKEA store in the world by Common Store Planning, and it's up to each store to adapt and implement each plan into the space they have. The concepts and main priority products usually stay the same, but in addition to adapting plans to the space we have, we also inject some solutions and choices that reflect our local market.
The lead designer is generally in charge of the space planning, material selection, construction documents, transfer management, and contractor / carpentry schedules. Because it was my very first time I had A LOT of help. My co-worker Marianne (a very seasoned IKEA designer) helped me every step of the way, and I simply could not have done this without her! I also had wonderful support from my manager Michael, my co-workers Robin and Loree, and our carpentry team David and Hugo. The project was packed with learning experiences and oops moments, but it's finally done. It's definitely been a challenging 8 weeks! Ok, enough talk, check out the pictures!
Priority Products - Klippan / Algot
Living room or play room? You decide.

Side note: Because products are always going in and out without a moment's notice, sometimes we (reluctantly) have to go back and adjust our design. Notice in the photo below that the sofa has been changed to a Lycksele sofa bed. It just so happens the Klippan sofa hit a snag somewhere along the line of its production and had to be pullled... literally two weeks after we finished the room. Just another day in the life of an IKEA designer!

Priority Products - Besta / Melby
Modern-age home office

I think that this particular room ended up being my favorite. If you look closely you can see a tv mounted on the wall amongst the artwork.When I initially saw the concept for the space I thought the space was kind of weird, but Loree and Robin brought it to life! I love the contrast, and I want all of those IKEA PS prints for myself! It would be nice to have an office with so much storage and seating. I could totally see Brandon with that desk, but my now-a-days my baby requires THREE 24" monitors. Yes, three. Nerds...


A country-bedroom-in-the-city vibe complete with a beautiful bathroom, and an attached balcony
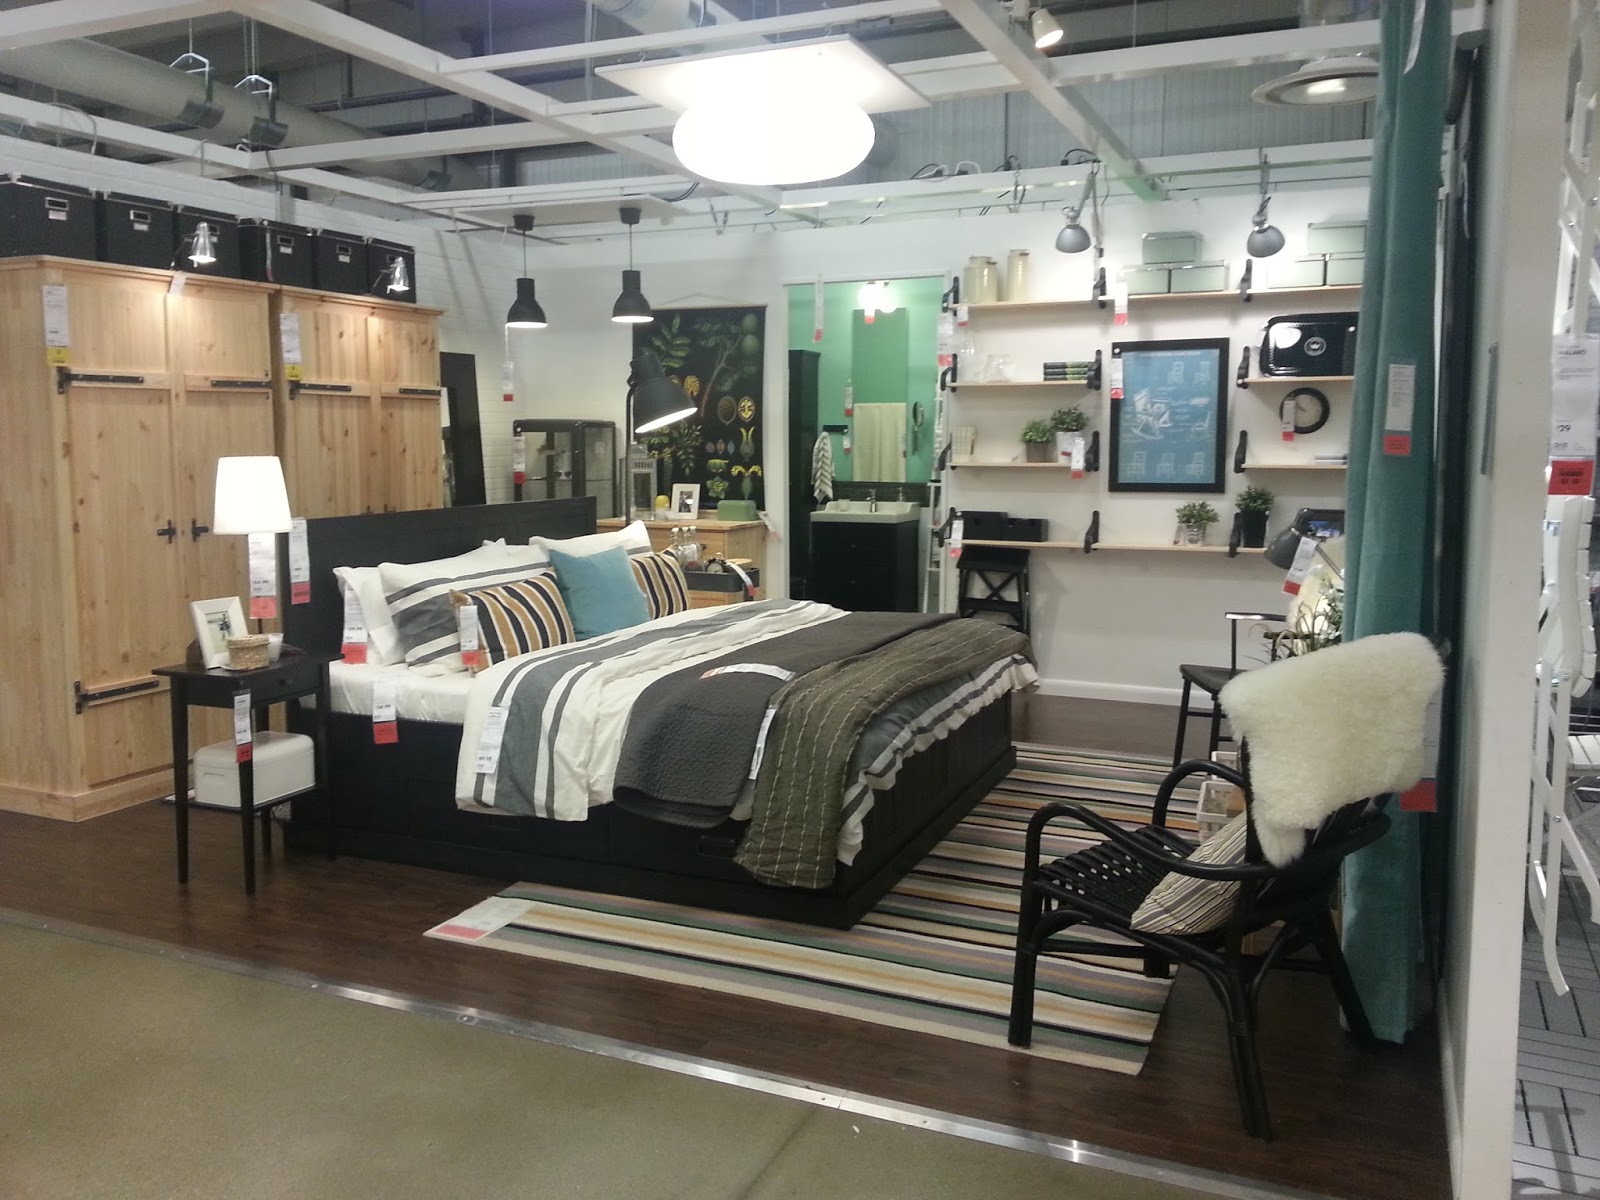
The idea of floating a bed in the middle of the room is one that I hope to try one day. If the room's big enough and the back of your bed is finished, why not?


Unique to IKEA Atlantic Station - Balcony outdoor area
Priority Products - Hyllis / Tarno

Quintessential media room for the family

I love how soothing and monochromatic this room turned out. Customers Ooo and Ahh over the sectional. I totally see this space in a terrace-level basement in the suburbs.

Unique to IKEA Atlantic Station - Patio outdoor area
Priority products - Falster / Applaro


Priority Products - Ektorp / Lidingo
An open-concept space for a family living with children


This summer I had the amazing opportunity to be the lead designer and project manager for this year's showroom entrance remodel. Every year we remodel the entrance to give visitors a taste of the new year's catalog priority, as well as present a microcosm of what IKEA is about. For fiscal year 14 IKEA is focusing on living with children. Every winter, a set of briefs are sent to every IKEA store in the world by Common Store Planning, and it's up to each store to adapt and implement each plan into the space they have. The concepts and main priority products usually stay the same, but in addition to adapting plans to the space we have, we also inject some solutions and choices that reflect our local market.
The lead designer is generally in charge of the space planning, material selection, construction documents, transfer management, and contractor / carpentry schedules. Because it was my very first time I had A LOT of help. My co-worker Marianne (a very seasoned IKEA designer) helped me every step of the way, and I simply could not have done this without her! I also had wonderful support from my manager Michael, my co-workers Robin and Loree, and our carpentry team David and Hugo. The project was packed with learning experiences and oops moments, but it's finally done. It's definitely been a challenging 8 weeks! Ok, enough talk, check out the pictures!
Priority Products - Klippan / Algot
Living room or play room? You decide.
Side note: Because products are always going in and out without a moment's notice, sometimes we (reluctantly) have to go back and adjust our design. Notice in the photo below that the sofa has been changed to a Lycksele sofa bed. It just so happens the Klippan sofa hit a snag somewhere along the line of its production and had to be pullled... literally two weeks after we finished the room. Just another day in the life of an IKEA designer!
Priority Products - Besta / Melby
Modern-age home office
I think that this particular room ended up being my favorite. If you look closely you can see a tv mounted on the wall amongst the artwork.When I initially saw the concept for the space I thought the space was kind of weird, but Loree and Robin brought it to life! I love the contrast, and I want all of those IKEA PS prints for myself! It would be nice to have an office with so much storage and seating. I could totally see Brandon with that desk, but my now-a-days my baby requires THREE 24" monitors. Yes, three. Nerds...
A country-bedroom-in-the-city vibe complete with a beautiful bathroom, and an attached balcony
The idea of floating a bed in the middle of the room is one that I hope to try one day. If the room's big enough and the back of your bed is finished, why not?
Unique to IKEA Atlantic Station - Balcony outdoor area
Priority Products - Hyllis / Tarno
Quintessential media room for the family
I love how soothing and monochromatic this room turned out. Customers Ooo and Ahh over the sectional. I totally see this space in a terrace-level basement in the suburbs.
Unique to IKEA Atlantic Station - Patio outdoor area
Priority products - Falster / Applaro
Priority Products - Ektorp / Lidingo
An open-concept space for a family living with children
Hopefully the purchase of a super chic, loft town home in a hip neighborhood is in our near future. Until then, I've been trying my best to show our bedroom some design love without spending a lot of dough. Since our plan is to only be in our current place for seven more months, I've decided to implement some fresh, frugal changes.

So here's what it looks like now.


The overall intent is still the same, but I made a couple of tweaks so save some cash. First, I decided to forgo purchasing some new end tables and use two we already had. On my side I'm rocking a lime green side table I purchased from Target a few years ago from their back-to-college clearance sale for $4.98.

Underneath I have a little basket that use for small things like the cable remote, my Kindle, and iPod.

And instead of doing the matchy-matchy thing for Brandon's side, I used the Trollsta side table I'd been hoarding underneath our bed. (Hey I have furniture hoarding tendencies, what can I say?)

But then I realized that the space wasn't nearly as adequate as it needed to be to accommodate all of the things that my techie hubby brings to his bedside. Even though he liked the idea that the top was metal, and he could sit his drinks down without using a coaster, I wasn't completely convinced. So I ended up using another shelf-turned-bedside-table that I picked up on clearance for $19 at CB2.

A tray from our dining room helped holds his Kindle Fire HD, Roku remote, TV remote, iPod, and a reading light his books. The Tiki was a gift from Brandon's Granny. He keeps lots of little odds and ends in there, gift cards, change, etc.


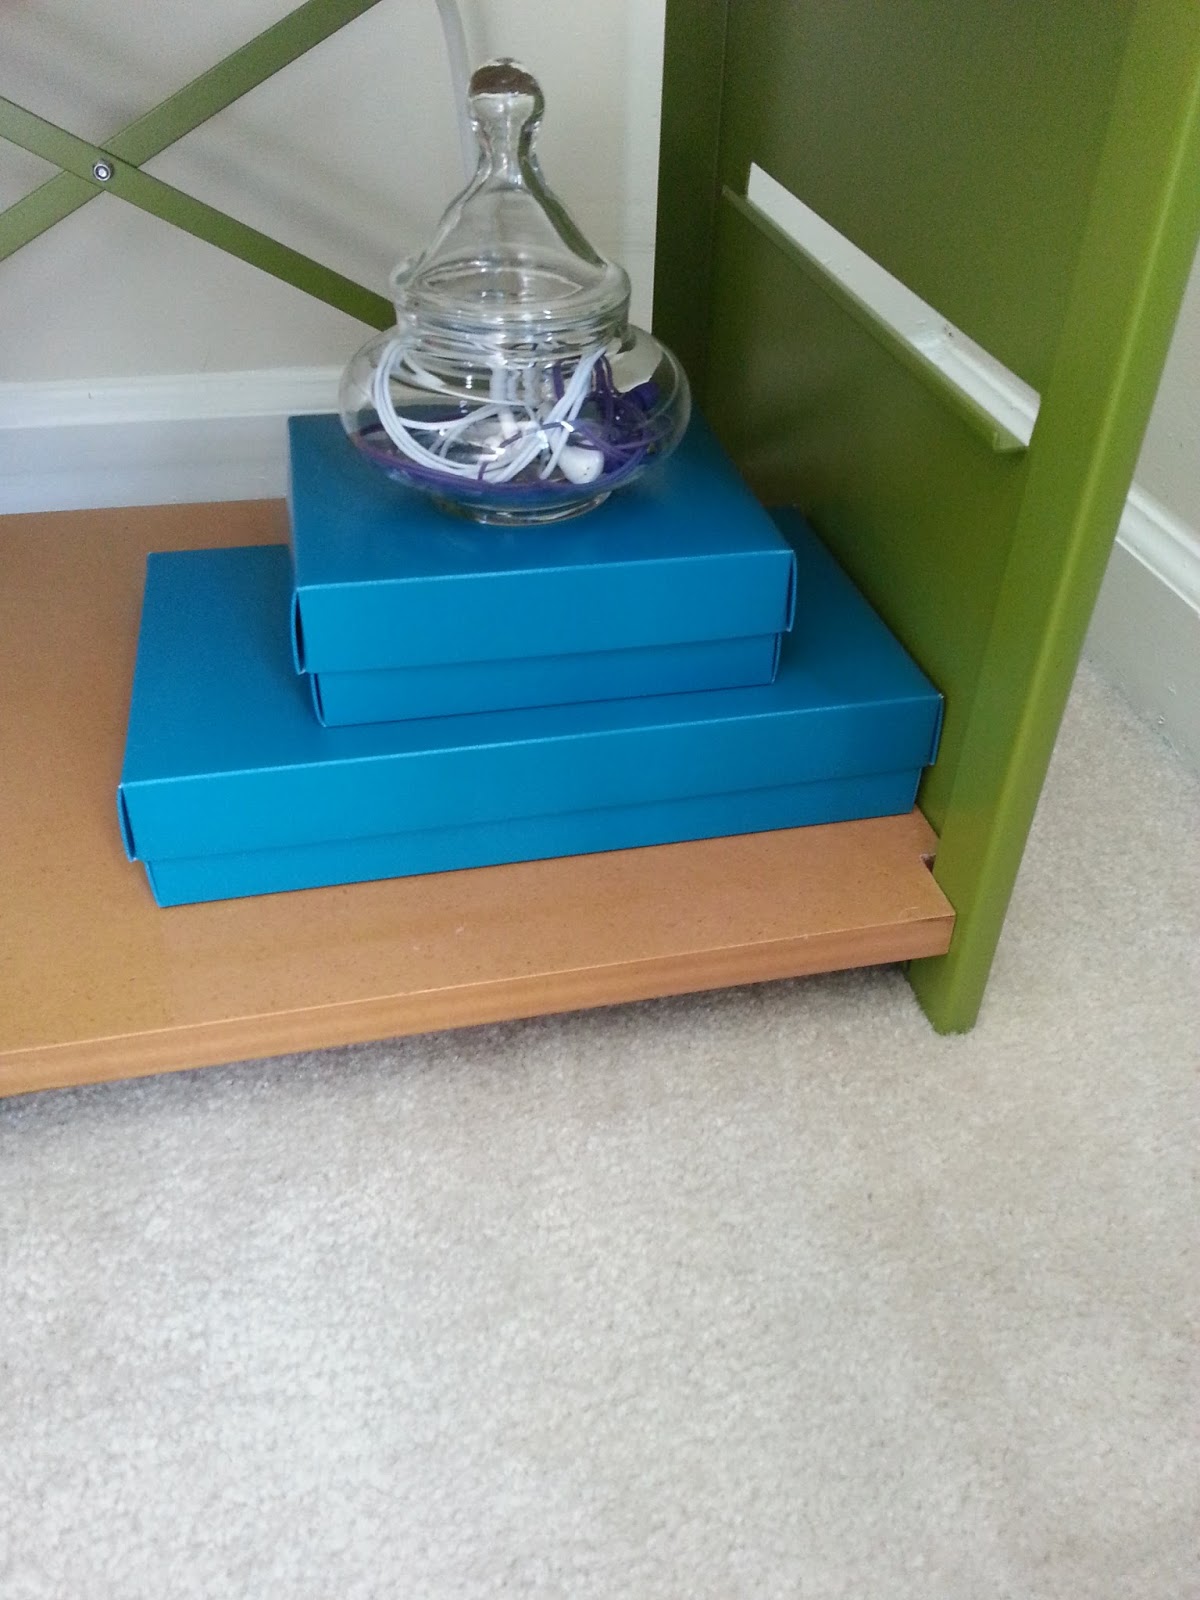
Underneath are a few paper boxes that hold his various chargers and such. A small apothecary jar I got from Goodwill holds his ear buds.
I needed a place for the accoutrements that we'd been accumulating on
our low dresser, so I decided to pick up a $15 Hyllis shelf and use it
in the corner. Of
course as lazy as I am I never mustered up the courage to finish sewing
our Britten Nummer curtains (the bottom hem was still being held
together with pins) so I decided to be daring and purchase a new pack
Natvide curtains out of As-Is. Thankfully they graze the floor perfectly
without having to rehang the curtain rod. I will say however that the
hazy blue light they cast when they're closed is taking a little while to get
used to.


For now the dresser is pretty much clear. My next project is to make inserts for the glass. I'm kinda over looking at clothes through the glass. I was thinking of cutting cardboard or poster board and wrapping them in fabric to place behind the glass panels. Here's the other side.


So for now, I'm content with our little makeover.


Hopefully the purchase of a super chic, loft town home in a hip neighborhood is in our near future. Until then, I've been trying my best to show our bedroom some design love without spending a lot of dough. Since our plan is to only be in our current place for seven more months, I've decided to implement some fresh, frugal changes.
So here's what it looks like now.
The overall intent is still the same, but I made a couple of tweaks so save some cash. First, I decided to forgo purchasing some new end tables and use two we already had. On my side I'm rocking a lime green side table I purchased from Target a few years ago from their back-to-college clearance sale for $4.98.
Underneath I have a little basket that use for small things like the cable remote, my Kindle, and iPod.
And instead of doing the matchy-matchy thing for Brandon's side, I used the Trollsta side table I'd been hoarding underneath our bed. (Hey I have furniture hoarding tendencies, what can I say?)
But then I realized that the space wasn't nearly as adequate as it needed to be to accommodate all of the things that my techie hubby brings to his bedside. Even though he liked the idea that the top was metal, and he could sit his drinks down without using a coaster, I wasn't completely convinced. So I ended up using another shelf-turned-bedside-table that I picked up on clearance for $19 at CB2.
A tray from our dining room helped holds his Kindle Fire HD, Roku remote, TV remote, iPod, and a reading light his books. The Tiki was a gift from Brandon's Granny. He keeps lots of little odds and ends in there, gift cards, change, etc.
Underneath are a few paper boxes that hold his various chargers and such. A small apothecary jar I got from Goodwill holds his ear buds.
I needed a place for the accoutrements that we'd been accumulating on
our low dresser, so I decided to pick up a $15 Hyllis shelf and use it
in the corner. Of
course as lazy as I am I never mustered up the courage to finish sewing
our Britten Nummer curtains (the bottom hem was still being held
together with pins) so I decided to be daring and purchase a new pack
Natvide curtains out of As-Is. Thankfully they graze the floor perfectly
without having to rehang the curtain rod. I will say however that the
hazy blue light they cast when they're closed is taking a little while to get
used to.
For now the dresser is pretty much clear. My next project is to make inserts for the glass. I'm kinda over looking at clothes through the glass. I was thinking of cutting cardboard or poster board and wrapping them in fabric to place behind the glass panels. Here's the other side.
So for now, I'm content with our little makeover.
Subscribe to:
Posts (Atom)


Social Icons