
It's not a secret that great design doesn't have to cost a lot of money. I stumbled upon this photo via Apartment Therapy and and fell in love with the look of identical shelving units flanking both sides of the sofa. Long story short, I couldn't deny it's chicness, but the units also looked pretty expensive. I racked my brain for a minute trying to figure out what I could use to duplicate this effect, then I remembered good ole' Hyllis, and everything came together. The shelving unit is only $15, and with a little spray paint added to its industrial look, it would be pretty easy to make Hyllis look like money.

Above are a few things that we've accumulated and things that I was hoping to purchase. I found out yesterday that the slot coffee table that I was hoping to buy (that was on sale for $199) is now gone. Yeah, I'm pretty bummed about it. Me and the hubby were just not able to sync up to check it out at the store. But I think it may mean that the Adair coffee table was really meant to be after all. Or maybe I'll find something cooler. You never know.
It's not a secret that great design doesn't have to cost a lot of money. I stumbled upon this photo via Apartment Therapy and and fell in love with the look of identical shelving units flanking both sides of the sofa. Long story short, I couldn't deny it's chicness, but the units also looked pretty expensive. I racked my brain for a minute trying to figure out what I could use to duplicate this effect, then I remembered good ole' Hyllis, and everything came together. The shelving unit is only $15, and with a little spray paint added to its industrial look, it would be pretty easy to make Hyllis look like money.
Above are a few things that we've accumulated and things that I was hoping to purchase. I found out yesterday that the slot coffee table that I was hoping to buy (that was on sale for $199) is now gone. Yeah, I'm pretty bummed about it. Me and the hubby were just not able to sync up to check it out at the store. But I think it may mean that the Adair coffee table was really meant to be after all. Or maybe I'll find something cooler. You never know.
Don't you just hate it when you find something really cute for the walls in your place, and the price tag is a little out of reach (or way out of reach)? So do I. A little while back, I was feeling the same way when I came across this art from CB2.


YES! I mean, who doesn't love a nice, affirmative statement? It's simple, bold, and modern. Just what I wanted for... well, to be honest, I didn't really know where I was going to put it, but I knew that I wanted it to come home with me. Then I saw that the price tag for just 3 letters was well over a $100 (on sale)! You know me, I just couldn't stand for that. So being the thrifty chick that I am, I took my booty right over to Hobby Lobby to make some magic happen.
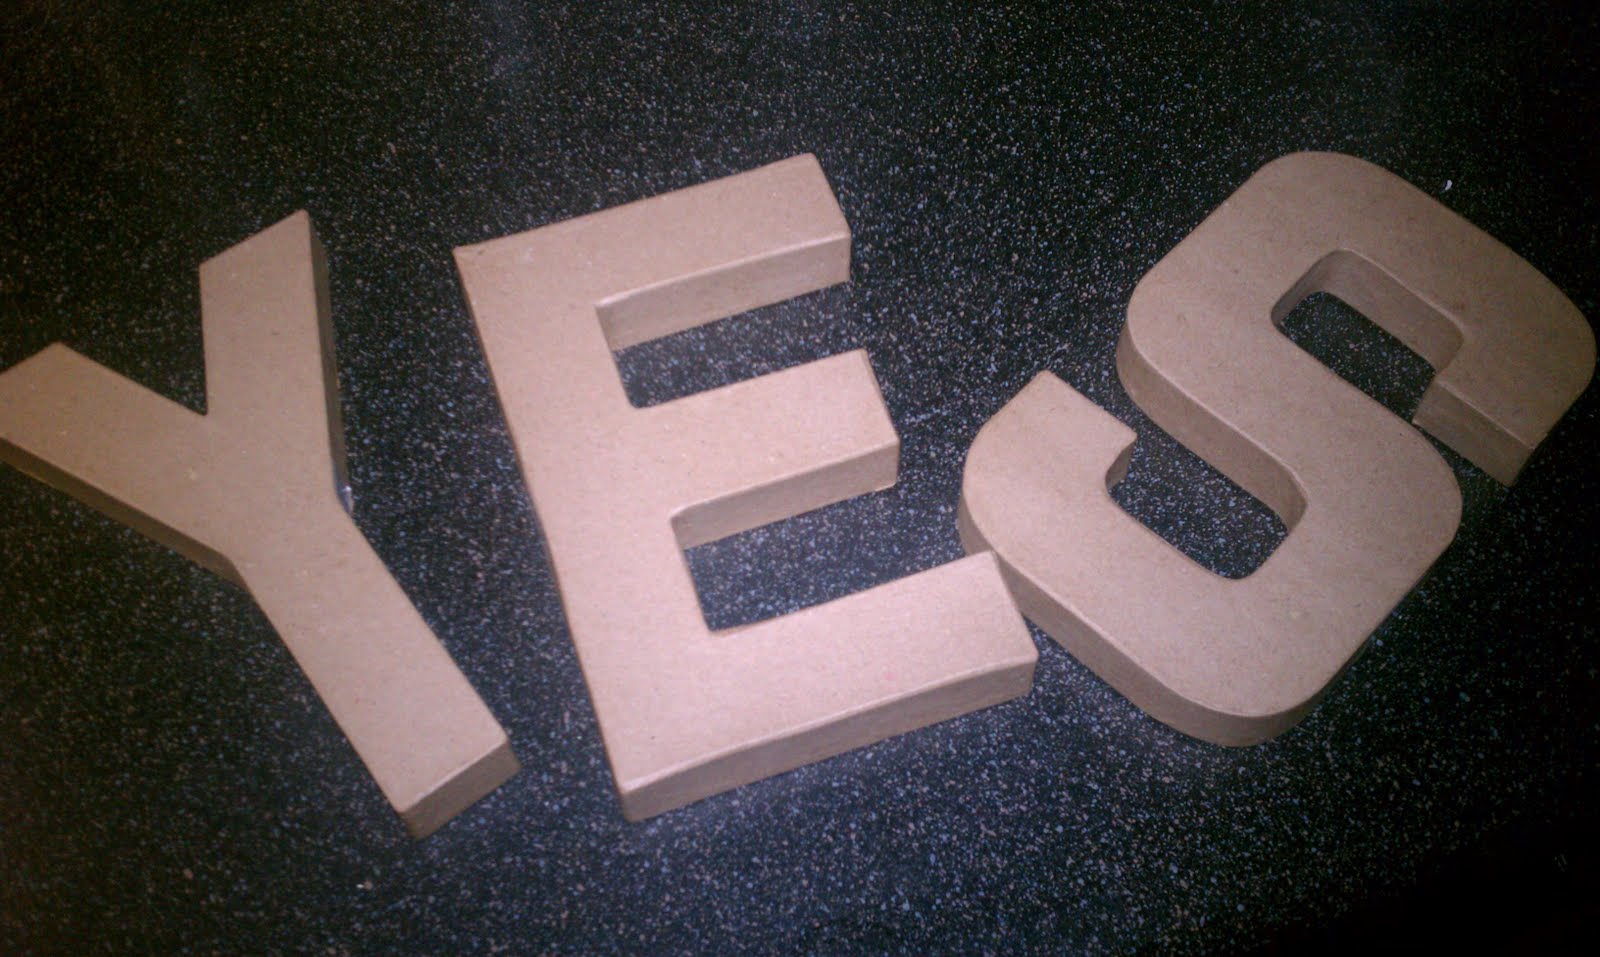
Smaller that the original, but still awesome, I bought three 3-D cardboard letters for $2.48 each. Then I got the paint out and went to town. I used red acrylic paint that I picked up for about $5 which came with all 3 primary colors plus black and white.


Altogether it took about 3 coats, and flipping the 3-D letters over between drying put the project at somewhere around the hour mark for completion.

In the end, I had this - which turned out to be amazingly similar to the CB2 original in shape and color.

Don't you just hate it when you find something really cute for the walls in your place, and the price tag is a little out of reach (or way out of reach)? So do I. A little while back, I was feeling the same way when I came across this art from CB2.
YES! I mean, who doesn't love a nice, affirmative statement? It's simple, bold, and modern. Just what I wanted for... well, to be honest, I didn't really know where I was going to put it, but I knew that I wanted it to come home with me. Then I saw that the price tag for just 3 letters was well over a $100 (on sale)! You know me, I just couldn't stand for that. So being the thrifty chick that I am, I took my booty right over to Hobby Lobby to make some magic happen.
Smaller that the original, but still awesome, I bought three 3-D cardboard letters for $2.48 each. Then I got the paint out and went to town. I used red acrylic paint that I picked up for about $5 which came with all 3 primary colors plus black and white.
Altogether it took about 3 coats, and flipping the 3-D letters over between drying put the project at somewhere around the hour mark for completion.
In the end, I had this - which turned out to be amazingly similar to the CB2 original in shape and color.
As you may recall, our sunroom was actually coming along rather nice. Here's a trip down memory lane.


Then I found the steal of the century - a $99 brand-spankin' new Cooper sofa (originally $799) from West Elm. I also found some cheap pillows, and unrolled a charming, little rug.

Then, I thought hey - why not take the side tables from the living room, and create a coffee table of sorts for a nice pop of color. So it transformed into this:

I also saved a pair of Linus chairs from As-is (notice the tag still on in this shot) for $18 each - originally $39.99. I covered one with our faux lamb skin for some variation.

So yeah, it was looking a little like this. Still some ways to go, but a big improvement from September of last year. But now, our sun room looks like this:


Yep, a little drowned out with the white cover and white end tables - we agreed to add the cover because we didn't want to risk discoloring the actual sofa with jeans, food, etc. Now it begs the question, what is a girl to do with all this white? I gotta work it out. Especially because I was going to choose a coffee table based on the black color of the Klamby. May he rest (or temporarily rest in piece). But it's not too much of a bummer. We do plan on moving in September, and we have yet to find a place in the city that's big enough for two sofas. And so another adventure begins!

First it was home to a myriad of flat-packed boxes.

Then I found the steal of the century - a $99 brand-spankin' new Cooper sofa (originally $799) from West Elm. I also found some cheap pillows, and unrolled a charming, little rug.

Then, I thought hey - why not take the side tables from the living room, and create a coffee table of sorts for a nice pop of color. So it transformed into this:

I also saved a pair of Linus chairs from As-is (notice the tag still on in this shot) for $18 each - originally $39.99. I covered one with our faux lamb skin for some variation.

So yeah, it was looking a little like this. Still some ways to go, but a big improvement from September of last year. But now, our sun room looks like this:

A complete H.A.M.! And why does our sunroom like this? Well, Klamby DIED!!! And when I say die, I mean the bottom cushions disconnected from the frame, and the only thing that was keeping the cushion up was the bottom lining covering up the sinuous springs (from that description, it's not far-fetched that I work at a home furnishings store). I'll admit, the sofa was cheap - and apparently cheaply made (surprise, surprise- IKEA free-range) therefore I can't blame it for giving out. We only used it for lounging and watching tv. And no, we didn't use it for any hanky panky, so I guess it did all it could do until it could do no more. Naturally, the smartest thing to do was to move Cooper out of the sun room and into the living room. Klamby took it's place... upside down. Why? Because my husband swears he's going to fix it. Seriously, that was almost a month ago (insert skepticism here). But here's Cooper taking Klamby's place.

Yep, a little drowned out with the white cover and white end tables - we agreed to add the cover because we didn't want to risk discoloring the actual sofa with jeans, food, etc. Now it begs the question, what is a girl to do with all this white? I gotta work it out. Especially because I was going to choose a coffee table based on the black color of the Klamby. May he rest (or temporarily rest in piece). But it's not too much of a bummer. We do plan on moving in September, and we have yet to find a place in the city that's big enough for two sofas. And so another adventure begins!
As you may recall, our sunroom was actually coming along rather nice. Here's a trip down memory lane.
Then I found the steal of the century - a $99 brand-spankin' new Cooper sofa (originally $799) from West Elm. I also found some cheap pillows, and unrolled a charming, little rug.
Then, I thought hey - why not take the side tables from the living room, and create a coffee table of sorts for a nice pop of color. So it transformed into this:
I also saved a pair of Linus chairs from As-is (notice the tag still on in this shot) for $18 each - originally $39.99. I covered one with our faux lamb skin for some variation.
So yeah, it was looking a little like this. Still some ways to go, but a big improvement from September of last year. But now, our sun room looks like this:
Yep, a little drowned out with the white cover and white end tables - we agreed to add the cover because we didn't want to risk discoloring the actual sofa with jeans, food, etc. Now it begs the question, what is a girl to do with all this white? I gotta work it out. Especially because I was going to choose a coffee table based on the black color of the Klamby. May he rest (or temporarily rest in piece). But it's not too much of a bummer. We do plan on moving in September, and we have yet to find a place in the city that's big enough for two sofas. And so another adventure begins!
First it was home to a myriad of flat-packed boxes.
Then I found the steal of the century - a $99 brand-spankin' new Cooper sofa (originally $799) from West Elm. I also found some cheap pillows, and unrolled a charming, little rug.
Then, I thought hey - why not take the side tables from the living room, and create a coffee table of sorts for a nice pop of color. So it transformed into this:
I also saved a pair of Linus chairs from As-is (notice the tag still on in this shot) for $18 each - originally $39.99. I covered one with our faux lamb skin for some variation.
So yeah, it was looking a little like this. Still some ways to go, but a big improvement from September of last year. But now, our sun room looks like this:
A complete H.A.M.! And why does our sunroom like this? Well, Klamby DIED!!! And when I say die, I mean the bottom cushions disconnected from the frame, and the only thing that was keeping the cushion up was the bottom lining covering up the sinuous springs (from that description, it's not far-fetched that I work at a home furnishings store). I'll admit, the sofa was cheap - and apparently cheaply made (surprise, surprise- IKEA free-range) therefore I can't blame it for giving out. We only used it for lounging and watching tv. And no, we didn't use it for any hanky panky, so I guess it did all it could do until it could do no more. Naturally, the smartest thing to do was to move Cooper out of the sun room and into the living room. Klamby took it's place... upside down. Why? Because my husband swears he's going to fix it. Seriously, that was almost a month ago (insert skepticism here). But here's Cooper taking Klamby's place.
Yep, a little drowned out with the white cover and white end tables - we agreed to add the cover because we didn't want to risk discoloring the actual sofa with jeans, food, etc. Now it begs the question, what is a girl to do with all this white? I gotta work it out. Especially because I was going to choose a coffee table based on the black color of the Klamby. May he rest (or temporarily rest in piece). But it's not too much of a bummer. We do plan on moving in September, and we have yet to find a place in the city that's big enough for two sofas. And so another adventure begins!
Just wanted to share a little something that I got from work yesterday. My co-worker gathered a bunch of pink carnations from an event that was going on and surprised me with them during my lunch. It really made my day! Here's what I did with them when I got home.

I immediately took out my acrylic block vase and separated each carnation into it's own little vile. Instead of the dining room table, I selected a spot on the sideboard for a nice change of scenery.

Then, call me fancy-schamcy, but I decided to light the tea lights that already had a home on the sideboard.

The colors were glorious.

Then I took the three remaining stems and gave them a home on the ledge between the kitchen and dining room. The flower bunch came with the most electric green moss I had ever seen. I was so smitten!

All in all, after a very long day at work, this was a very sweet ending. Thanks, Marie!
Just wanted to share a little something that I got from work yesterday. My co-worker gathered a bunch of pink carnations from an event that was going on and surprised me with them during my lunch. It really made my day! Here's what I did with them when I got home.
I immediately took out my acrylic block vase and separated each carnation into it's own little vile. Instead of the dining room table, I selected a spot on the sideboard for a nice change of scenery.
Then, call me fancy-schamcy, but I decided to light the tea lights that already had a home on the sideboard.
The colors were glorious.
Then I took the three remaining stems and gave them a home on the ledge between the kitchen and dining room. The flower bunch came with the most electric green moss I had ever seen. I was so smitten!
All in all, after a very long day at work, this was a very sweet ending. Thanks, Marie!
I swear I've been thinking about my blog all week. I wish I had the time and strength to post every day but alas, a girls gotta sell kitchens (at ridiculous times during the week). Today I wanted to share a cute, little project that I did on my day off to dazzle up the forgotten corner of our bedroom. I knew we needed some artwork, so I did myself a favor and raided my parents attic for some free frames last time I was home.

Here's the box I smuggled back from Leesburg. Notice the nice, thick layers of dust.

Check out the dark frames. I managed to find 6 matching ones with awesome pictures of cheetahs, elephants, and zebras inside, and when I say awesome, I do mean awesome. The photos were nifty because I used as templates for hanging.

Side note, check out the chair. It once belonged to my grandmother, and I feel so blessed that I was able to give it a new home. Can't stand to see a mid century chair go to waste! Here's a better photo of it.

It's actually in really good condition, but I plan on re-staining the arms later down the road. When I wiped it down (with soap and water) the arms started to reveal the wood grain. It was pretty amazing.

Check out that gradation on the arms! P.S. gotta love that mustard/avocado upholstery. It's pretty lovely. I did however decide to put a faux lambskin over the back so that the chair didn't get completely lost in front of our burlap curtains. But back to the frames. Here they are in all their glory.

Not bad for a neglected corner.

Check it out. The mat for the frames is just the original cardboard backing that kept the African pictures in place. All the art is just quotes and such that make me happy. Here's a closeup.

In case you're wondering, it's true.
I swear I've been thinking about my blog all week. I wish I had the time and strength to post every day but alas, a girls gotta sell kitchens (at ridiculous times during the week). Today I wanted to share a cute, little project that I did on my day off to dazzle up the forgotten corner of our bedroom. I knew we needed some artwork, so I did myself a favor and raided my parents attic for some free frames last time I was home.
Here's the box I smuggled back from Leesburg. Notice the nice, thick layers of dust.
Check out the dark frames. I managed to find 6 matching ones with awesome pictures of cheetahs, elephants, and zebras inside, and when I say awesome, I do mean awesome. The photos were nifty because I used as templates for hanging.
Side note, check out the chair. It once belonged to my grandmother, and I feel so blessed that I was able to give it a new home. Can't stand to see a mid century chair go to waste! Here's a better photo of it.
It's actually in really good condition, but I plan on re-staining the arms later down the road. When I wiped it down (with soap and water) the arms started to reveal the wood grain. It was pretty amazing.
Check out that gradation on the arms! P.S. gotta love that mustard/avocado upholstery. It's pretty lovely. I did however decide to put a faux lambskin over the back so that the chair didn't get completely lost in front of our burlap curtains. But back to the frames. Here they are in all their glory.
Not bad for a neglected corner.
Check it out. The mat for the frames is just the original cardboard backing that kept the African pictures in place. All the art is just quotes and such that make me happy. Here's a closeup.
In case you're wondering, it's true.
Subscribe to:
Posts (Atom)


Social Icons